Jun 08, 2020
How Do You 3D Print A Tortoise Shell?
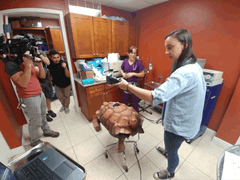
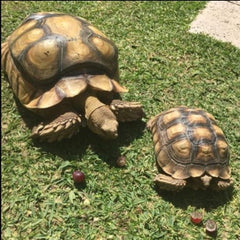
In 2017, Hurricane Irma swept through South Florida. Once of the unintended effects of the storm was that George, a Sulcata tortoise, escaped from his home and was hit by a car. He was rushed to the Broward Avian and Exotic Animal Hospital and came under the care of Dr. K.
After stabilizing George and allowing a couple moths for recuperation, 3DChimera was asked to come in and solve a new, living, engineering problem. To create a safe, watertight, sanitary shell replacement for the area George had lost.
Using our team's deep expertise in 3D scanning, materials, and 3D printing, we were able to come up with a lifelong solution for our new friend, George.
OUR IDEA
We brainstormed the best ways to give George a lifelong housing solution. We knew it needed to be both durable and flexible.
Spending all their time on the ground foraging, tortoises tend to bump, scratch and grab plants that grow above them.
We knew that the best way to get the necessary fit on a replacement shell was to 3D scan George and engineer a precise fit. We also knew that the idea l material to 3D print his new shell would be PETG, a material known for being both tough and flexible enough for George to move around comfortably, yet not be weighed down.
Harnessing these 2 technologies would give us the best chance for success.
TOOLS & TECHNIQUES
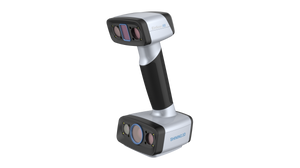
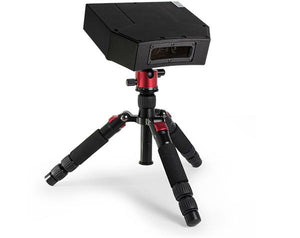
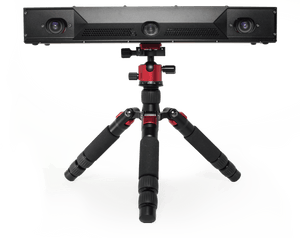
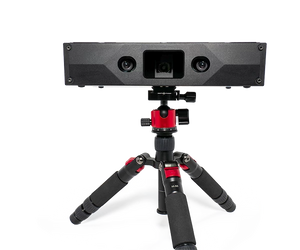
We pulled the Creaform Handyscan 700 from our shelf because it can capture high-quality images during scanning and the VXElements smart algorithm will convert those images to a photorealistic mesh texture.
Scan
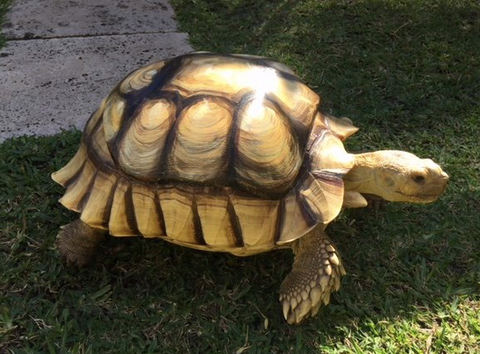
Using Geomagic for SOLIDWORKS to convert the STL data to a STEP file, we were able to use George's exact shell data to create a prosthetic cover that would be a perfect match for his existing shell. We mounted the prosthetic with an adhesive-backed velcro since both Lenard (George's owner) and Dr. K still need access to monitor and clean the wound.
Printing shell in PETG took approximately 24 hours in-house on our German RepRap x400 3D printer, and we were able to bring the replacement in the following day to fit George.
Concurrently, we printed a jig to place on George's existing shell to quickly and correctly mount the velcro strips in place, alongside Dr. K and her team. George's prosthetic was a perfect fit on the first try.

Apply
Since then, he's had the touch of a master artist to give the appearance of a natural pattern, and keep his coverup low-key.
Relax
You can watch the full segment of Dr. K's Exotic Animals here or view the whole episode on Disney+ (it is season 5 episode 8!)